“Mastering Concrete Finishing Trowels: Techniques, Tips, and Troubleshooting”
A concrete finishing trowel is a hand tool (or a machine) used in the final stages of concrete work. Its primary purpose is to create a smooth, hard, and dense surface on freshly poured concrete slabs, floors, or pavements after initial leveling (screeding) and floating operations are complete.
Why is finishing Troweling So Important?
Proper troweling doesn’t just make the concrete look good; it significantly impacts its performance:
Smoothness: Creates an even, flat surface suitable for foot traffic, floor coverings, or specific aesthetic requirements.
Density & Hardness: Compacts the surface paste (cement and fine sand), reducing porosity and increasing wear resistance.
Durability: A well-troweled surface is less permeable to water and chemicals, protecting the concrete and any embedded reinforcement (rebar) from degradation.
Sealing: Closes up the surface pores left after floating, preventing excessive evaporation and potential shrinkage cracking.
Key Components of a Hand Finishing Trowel:
Blade: The flat, rectangular (or sometimes curved) part that contacts the concrete. Material, size, and flexibility are key characteristics.
Shank/Mounting: Connects the blade to the handle. Its rigidity and the quality of the rivets or welds affect durability and feel.
Handle: What the user holds. Material and shape impact comfort and control.
Types of Finishing Trowels
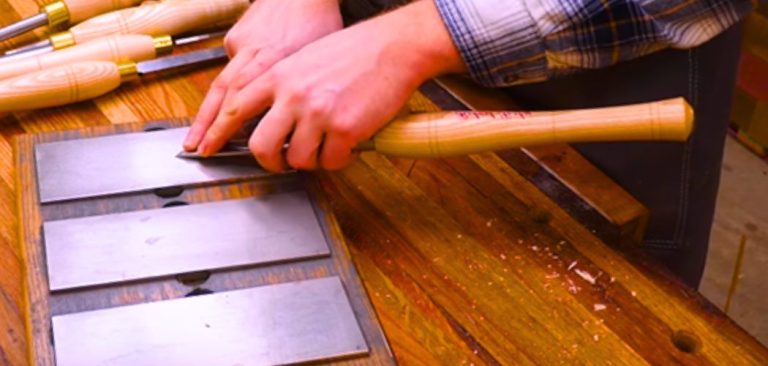
1. Hand Finishing Trowels:
Used for slab edges, corners, detailed areas, and high-precision smoothing.
Blade Materials & Properties:
- High-Carbon Steel (e.g., AISI 1070–1095):
Pros: Very hard, durable, maintains flatness, affordable. Delivers excellent abrasion resistance due to ~45–55 HRC hardness and 200 GPa stiffness. Ideal for tough, smooth concrete surfaces.
Cons: Susceptible to rust without oiling. Can “burn” or discolor light-colored concrete if over-troweled. Heavier than other materials.
Typical Use: General-purpose finishing requiring high surface hardness. - Stainless Steel (AISI 300/400 Series):
Pros: Highly corrosion-resistant due to chromium oxide (Cr₂O₃) layer. Essential for decorative/white/colored concrete and epoxy overlays. Easy maintenance.
Cons: More expensive. The 300 series is softer; the 400 series is stiffer but less corrosion-resistant.
Typical Use: Architectural concrete and environments demanding cleanliness. - Blue Steel (Tempered Carbon Steel):
Pros: Thin (0.015–0.030 in), flexible, lightweight. Feels “broken-in” immediately. Allows for detailed feathering and premium, mirror-like finishes.
Cons: Requires expert handling to avoid surface dips. Rusts fast if not cleaned.
Typical Use: High-end, smooth finishes on polished floors and overlays. - Magnesium:
Pros: Very lightweight (1.74g/cm³), ideal for large slabs. Opens concrete pores, allowing bleed water/air to escape—great for air-entrained concrete. Low surface drag.
Cons: Wears quickly. Doesn’t provide a dense, glossy finish like steel.
Typical Use: Early finishing stages and final pass on air-entrained slabs to avoid blistering.
Blade Sizes (L × W):
Common lengths: 12–24 in.
Widths: 3–5 in.
Popular sizes: 16×4 in. and 18×4 in.
Larger (20×5, 24×5): More area, higher skill.
Smaller (12×3, 14×4): Tighter spaces, detail work.
Blade Shape:
- Rectangular: Standard design.
- Pool Trowel (Rounded Ends): 10×3 to 16×4 in. Prevents gouging on curves, stairs, or decorative forms.
Handle Types:
- Wood (Camelback) – Traditional, absorbs vibration.
- Plastic/Composite – Easy to clean, durable.
- Comfort Grip (DuraSoft®) – Cushioned, ergonomic, preferred for all-day jobs.
2. Fresno Trowels (Long-Handled):
Blade size: 24–48 in. long × 5 in. wide.
Material: Blue or tempered steel.
Used post-floating, pre-hand troweling to flatten large areas and embed aggregates. Does not provide final polished finish.
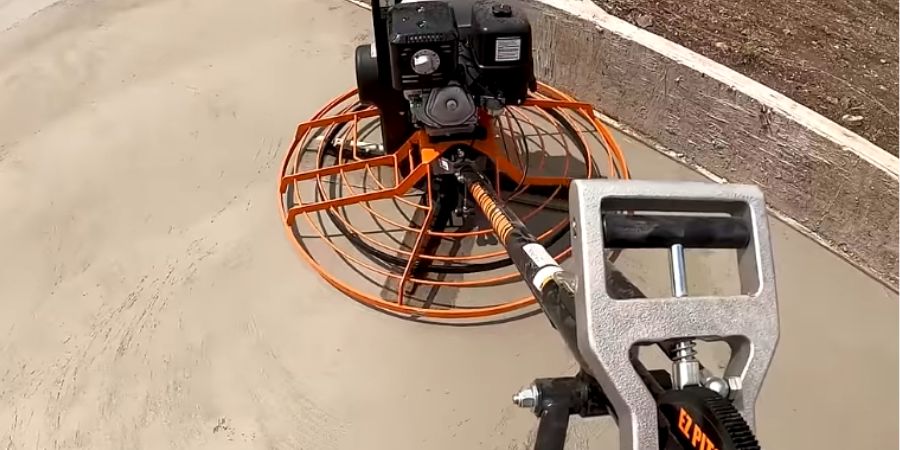
3. Power Trowels (Walk-Behind & Ride-On):
- Walk-Behind: Blade diameters: 24, 36, 46/48 in. Gas or electric-powered.
- Ride-On: Dual rotors, 36–48 in. each. Propane/gas-powered. For massive industrial slabs.
Blade Types:
- Float Blades/Pans: Flattening and compaction.
- Finish Blades: Angled pitch, densifies concrete on later passes.
- Combination Blades: Pitch-adjustable—does both floating and finishing.
Choosing the Right Trowel for You
Selecting the proper finishing trowel isn’t just about material—it’s about understanding how your project size, concrete type, desired finish, budget, and skill level interact on the slab.
Project Size:
- Small patch or edge work? A hand trowel offers precision and control.
- Medium-sized slabs or patios? Stick with a hand trowel, but consider starting with a Fresno for flattening before detailed finishing.
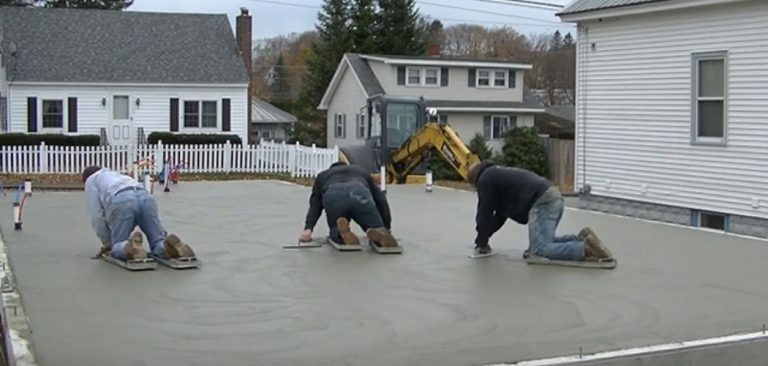
- Large garage floor or warehouse? A power trowel is essential—not optional—for productivity and uniformity.
Concrete Type:
- Standard concrete mix? Both carbon steel and stainless steel perform well.
- Air-entrained concrete? Begin with magnesium, or use steel carefully to avoid premature sealing that traps bleed water and causes delamination.
- Colored or decorative concrete? Always opt for stainless steel to prevent rust stains that can ruin surface aesthetics.
Desired Finish:
- Smooth standard finish? Carbon steel or stainless steel will do the job.
- Ultra-smooth/glossy finish? Choose blue steel—its thin, flexible blade allows for feather-light touch, but it demands experience.
Budget Consideration:
- Most cost-effective? Carbon steel.
- Mid-range? Magnesium, then blue steel.
- Highest cost? Stainless steel, justified in high-spec jobs.
- Power trowels represent a significant upfront investment but pay off on large-scale jobs.
User Comfort & Skill Level:
- Fatigue-sensitive or long-duration work? Go with lightweight magnesium or comfort grip handles like DuraSoft®.
- Advanced users? Blue steel provides unmatched finishing but requires finesse.
- Larger hand trowels (20×5, 24×5) cover more ground but demand control to avoid uneven pressure.
Maintenance Best Practices:
- Clean Immediately: Rinse off wet concrete with water; use a stiff brush if needed.
- Dry Thoroughly: Prevent oxidation—especially critical for steel blades.
- Oil Carbon & Blue Steel Blades: Apply light tool oil or WD-40 before storage to prevent rust.
Expert Finisher Tips
- Balance & Ergonomics: A well-balanced trowel minimizes wrist fatigue. Handle shape, weight distribution, and shank rigidity all contribute to control.
- Rivets vs. Welds: High-quality riveted or welded shanks ensure stability under load—crucial during aggressive finishing.
- Blade Wear Profile: Even blade wear indicates proper technique and a well-made trowel. Uneven wear usually signals improper angle or pressure.
- Job-Specific Tuning: Choose flexible blue steel for feathering and blending. Opt for rigid carbon steel when densifying or achieving high FF tolerances.
How Troweling Works: Mechanics & Surface Science Made Simple
Troweling is more than smoothing concrete—it’s a technical process that improves surface strength, durability, and finish quality.
Pressure Application & Densification:
When you press down with a hand trowel (usually 1–5 psi or 7–35 kPa) or a heavier power trowel, you compact the top few millimeters of concrete. This pushes out tiny air gaps (voids), increases surface density, and lowers the water-cement ratio at the top—making it harder and more resistant to wear and abrasion.
Angle of Attack & Hydroplaning:
Your first pass should be flat to level the concrete. Later, slightly tilt the front of the trowel up (0° to 10–15°). This puts more pressure on the back of the blade, helping shear the surface, align fine particles, push out air and water bubbles, and create a polished look. But if you tilt too much or move too fast while the surface is still wet, the trowel can “hydroplane” on bleed water, reducing compaction.
Capillary Pore Refinement:
Troweling compresses the cement paste, shrinking the pores that allow water or chemicals in. This makes the concrete surface more durable and less likely to crack or degrade over time.
Blade Flatness Tolerance:
Good trowels are manufactured to stay flat across their entire surface. If the blade isn’t flat, it can leave dips or waves in the concrete. For professional projects, flatness and levelness (called FF and FL numbers) are critical—and they depend heavily on consistent screeding, floating, and troweling. Standards like ASTM E1155 define acceptable levels.
Concrete Mix Behavior and Its Impact on Finishing Trowel Performance
The performance of a finishing trowel is directly influenced by the concrete’s properties and its current state during placement.
Setting Time & Timing:
The troweling window—when the surface is ready for finishing—is critical. This is often measured by penetration resistance (ASTM C403), with values typically between 0.5 and 10 psi (3.5–70 kPa) for initial passes, increasing for later stages. Environmental factors like temperature, humidity, wind speed, concrete mix temperature, cement type, and admixtures (retarders or accelerators) greatly influence this window.
Too early? You risk trapping bleed water or air.
Too late? The surface becomes too stiff, reducing smoothness and compaction potential.
Air-Entrained Concrete:
With these mixes, early steel troweling can seal the surface too soon, trapping rising air and forming blisters or delamination. To avoid this:
Begin with magnesium floats or trowels.
Delay switching to steel until the concrete is firmer.
Use multiple flat passes before increasing blade angle to gently densify the surface.
Slump and Workability:
High-slump (wet) mixes need delayed finishing to avoid sinking aggregates or bringing excess water/fines to the surface. Lower-slump mixes require more force to trowel effectively and often provide a tighter finishing window.
Aggregates and Fibers:
Large or angular aggregates can resist smooth finishing. Fiber-reinforced concrete (synthetic or steel fibers) may pull to the surface during finishing. Adjustments like blade material selection and specific troweling motions help mitigate these issues.
Admixtures:
Ingredients like water reducers, superplasticizers, accelerators, and retarders affect both the workability and the setting time. Each requires careful attention to troweling timing and technique to ensure a consistent finish.
Advanced Troweling Techniques and Common Finishing Problems (and How to Fix Them)
Even with the right tools and timing, achieving a perfect finish takes technique. Here’s how experienced finishers approach advanced methods—and how they solve problems when things go wrong.
Power Troweling Strategy: Not Just Spin and Speed
Power troweling is a systematic process, not just running the machine around. It usually follows this pattern:
- Start with float pans or combination blades, set flat with zero pitch, using low RPMs. This levels and compacts the surface gently.
- As the concrete hardens, switch to finish blades, increasing the pitch angle (3–5° per pass) and RPM.
- Use 50% overlap patterns to ensure consistency, even finishing across the whole slab.
- For high-spec floors (like FF > 50, FL > 30), this precision is a must—and you may need tools like laser-guided check rods to verify results.
Hard Troweling: For Maximum Durability
Hard troweling is used when you need a super dense, burnished surface, like in warehouses or factories.
- It involves multiple passes (often 5 or more) with a power trowel.
- Each pass increases blade pitch and pressure as the concrete stiffens.
- Done right, it creates a steel-like, ultra-hard finish that resists abrasion.
Troubleshooting Common Surface Defects
Even pros face issues—here’s what they mean and how to fix them:
- Chatter Marks
What it looks like: Rhythmic surface imperfections.
Cause: Vibration, troweling too fast, or with the wrong blade angle.
Fix: Adjust speed, blade pitch, or wait until concrete firms up a bit. - Blistering / Delamination
What it looks like: Surface looks fine but lifts or pops later.
Cause: Sealing air-entrained concrete too early or trapping bleed water.
Fix: Use magnesium tools early, wait longer before switching to steel, and trowel flat initially. - Craze Cracking
What it looks like: A spider-web of fine surface cracks.
Cause: Concrete dried too quickly from sun, wind, or low humidity.
Fix: Apply curing compound promptly or use plastic sheeting to slow moisture loss. - Dusting
What it looks like: Weak, chalky surface.
Cause: Finishing over bleed water or using poor curing practices.
Fix: Delay finishing, ensure proper timing, and cure thoroughly.
Read also: