Using a finishing trowel is essential for achieving smooth, professional-looking surfaces in plastering and concrete work. This tool helps to create a polished finish, making your project look neat and complete.
If you are new to trowel work or just need a refresher, learning the right techniques can make all the difference. A finishing trowel is designed to help you achieve a flat, even surface with minimal effort. Whether you are working on a DIY project at home or a professional job, mastering the use of this tool can save you time and improve your results.
In this guide, we will cover the basics of using a finishing trowel, ensuring your surfaces look flawless every time. Let’s get started on the path to smooth, perfect finishes!
Introduction To Finishing Trowels
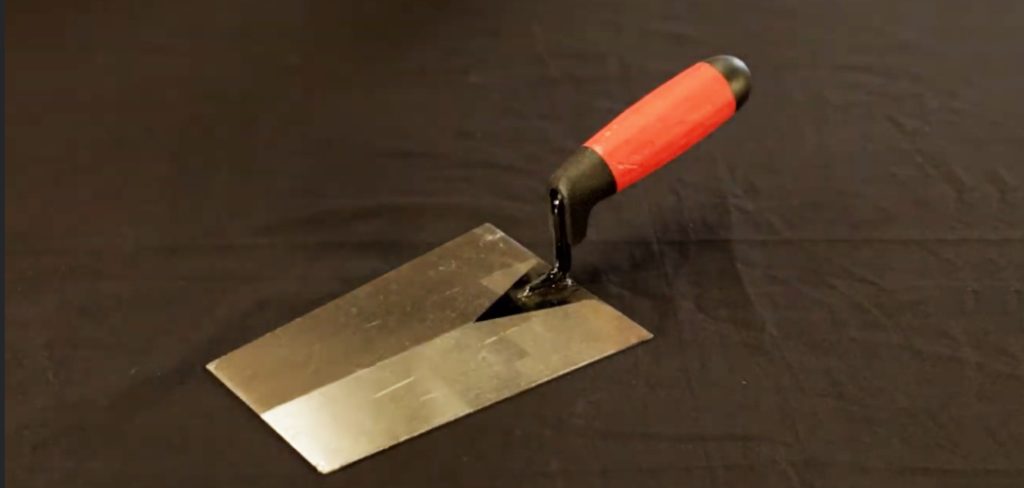
Finishing trowels are essential tools in masonry and concrete work. These tools ensure smooth, even surfaces. They are handy for both professionals and DIY enthusiasts. Understanding their purpose and types can improve your project outcomes.
Purpose And Function
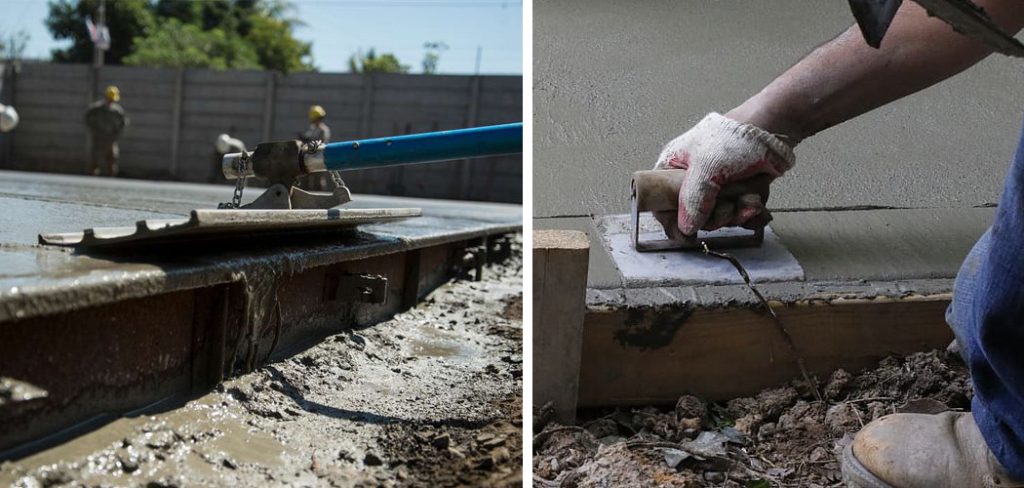
The primary purpose of a finishing trowel is to create a smooth finish. It is used after concrete is poured or plaster is applied. The trowel helps eliminate air pockets and surface imperfections. This results in a polished and professional look.
Finishing trowels come in various sizes and shapes. Each type serves a specific function. Some are better for large areas, while others work well for detailed tasks. Knowing which trowel to use can make your work easier and more efficient.
Types Of Finishing Trowels
There are several types of finishing trowels. Here are some common ones:
- Steel Trowels: These are the most common. They are durable and versatile. Suitable for most concrete and plaster jobs.
- Magnesium Trowels: These are lightweight. Ideal for floating concrete to achieve a smooth surface.
- Pool Trowels: These have rounded ends. Perfect for curved surfaces like swimming pools.
- Corner Trowels: These are designed for finishing corners. They ensure sharp, clean edges.
Each trowel type has specific uses. Choosing the right one can save time and effort. Below is a table summarizing the main types and their uses:
| Type | Material | Best For |
| Steel Trowel | Steel | General concrete and plaster work |
| Magnesium Trowel | Magnesium | Smoothing concrete surfaces |
| Pool Trowel | Steel | Curved surfaces |
| Corner Trowel | Steel | Finishing corners |
Understanding the types and purposes of finishing trowels can significantly impact your project. Make sure to select the appropriate trowel for the job at hand.
Selecting The Right Trowel
Choosing the right finishing trowel is crucial for a smooth finish. The right trowel makes the job easier and ensures a professional result. Consider material, size, and shape before making your choice.
Material Considerations
Trowels come in different materials. Stainless steel trowels are rust-resistant and durable. They are best for wet conditions. Carbon steel trowels are strong but can rust. They need more maintenance. Plastic trowels are lightweight and good for small jobs. They are less durable than steel.
Size And Shape Options
Trowels vary in size and shape. Small trowels are good for tight spaces. Large trowels cover more area quickly. Rectangular trowels are common and versatile. Rounded-edge trowels help avoid lines and marks on the surface. Choose the size and shape based on your project needs.
Essential Tools And Materials
To use a finishing trowel effectively, you’ll need the right tools and materials. Having everything ready before you start can make the job easier and quicker.

Tool Checklist
Before you begin, ensure you have the following essential tools:
- Finishing Trowel: The primary tool for smoothing surfaces.
- Hawk: Holds plaster or mortar for easy access.
- Bucket: For mixing materials.
- Mixing Paddle: Attached to a drill for easy mixing.
- Level: Ensures surfaces are even.
- Sponge: For cleaning tools and surfaces.
- Safety Gear: Gloves, goggles, and a mask to protect yourself.
Material Requirements
Having the right materials is just as important. Here’s what you’ll need:
- Plaster or Mortar: Choose the correct type for your project.
- Water: Essential for mixing plaster or mortar.
- Bonding Agent: Helps new plaster adhere to old surfaces.
- Joint Compound: For filling gaps and smoothing surfaces.
Organize your tools and materials before starting to ensure a smooth workflow. This preparation can save you time and effort.
Preparing The Surface
Preparing the surface is a crucial step before using a finishing trowel. A well-prepared surface ensures a smooth and professional finish. This section will guide you through the essential steps: cleaning and priming, and surface assessment.
Cleaning And Priming
Cleaning the surface is the first step. Remove all dust, dirt, and debris. Use a broom, vacuum, or damp cloth. This helps the finishing trowel glide smoothly.
Next, prime the surface. This step is important for better adhesion. Choose a primer suitable for your material. Apply it evenly and let it dry. This creates a solid base for your finishing work.
Surface Assessment
After cleaning and priming, assess the surface. Check for cracks, holes, or uneven areas. Use a straightedge to identify high and low spots.
For minor imperfections, fill them with a patching compound. Let it dry completely. For larger issues, consider resurfacing the area. Ensure the surface is level and smooth before using the finishing trowel.
| Step | Action |
| Cleaning | Remove dust, dirt, and debris |
| Priming | Apply an appropriate primer |
| Surface Assessment | Check and repair imperfections |
Basic Techniques
Learning to use a finishing trowel can enhance your plastering skills. It requires proper technique and practice. In this section, you will learn the basic techniques of using a finishing trowel effectively.
Holding The Trowel
Hold the trowel with a firm grip. Place your index finger on the top of the handle. This gives you better control. Keep your wrist straight and relaxed. This reduces fatigue.
Position the trowel at a slight angle to the surface. This helps in applying even pressure. Ensure the blade is clean before starting. A clean blade provides a smooth finish.
Applying The Plaster
Load a small amount of plaster onto the trowel. Scoop the plaster with the edge of the trowel. Start at one corner of the wall. Spread the plaster with long, sweeping motions. Maintain a consistent pressure throughout.
Work in small sections for better control. Overlap your strokes slightly to avoid gaps. Smooth out any ridges or bumps as you go. Keep the trowel clean to prevent dried plaster from ruining the finish.
Once you cover the area, let the plaster set slightly. Then, go over it again with the trowel. This will create a smooth, polished surface.
Advanced Troweling Tips
Advanced troweling techniques can make a huge difference in your work. Mastering a finishing trowel involves more than just basic skills. With these tips, you can achieve a professional look with every project. Let’s delve into some advanced tips for using a finishing trowel effectively.
Creating Smooth Finishes
To create smooth finishes, keep your trowel clean. Any debris can ruin the surface. Hold the trowel at a slight angle. This helps to spread the material evenly. Apply consistent pressure. This ensures a uniform finish. Make sure to overlap your strokes. This avoids lines and gaps in the material.
Work in small sections to maintain control. This lets you focus on detail and smoothness. Remember, patience is key. Rushing can lead to mistakes and a poor finish.
Avoiding Common Mistakes
Many beginners make common mistakes with a trowel. One big mistake is using too much pressure. This can cause uneven surfaces. Another mistake is not cleaning the trowel often.
This can leave debris in your finish. Also, avoid using a dry trowel. Always keep it slightly damp. This helps in creating smooth finishes. Lastly, don’t neglect your trowel. Keep it in good condition. A well-maintained trowel lasts longer and works better.
Finishing Touches
Once you have spread and smoothed your concrete, it’s time for the final steps. These finishing touches ensure a polished, professional look. They also enhance the durability and longevity of your surface.
Polishing The Surface
After the initial smoothing, let the concrete set slightly. This usually takes about 10-15 minutes.
Next, hold your finishing trowel at a slight angle. Glide it over the surface in smooth, even strokes. This helps to remove any imperfections.
Repeat the process, applying light pressure. You want a uniform, glossy finish.
Tip: Use a circular motion for best results.
Inspecting Your Work
Once polished, take a close look at your work. Walk around and inspect from different angles.
Look for any small cracks or air bubbles. Fill these with a small amount of concrete mix.
Check the edges and corners. Make sure they are smooth and even.
Tip: Use a bright light to spot any flaws you might miss.
| Step | Action |
| Set Time | 10-15 minutes |
| Polish | Use smooth, even strokes |
| Inspect | Look from different angles |
| Fix | Fill cracks with concrete mix |
These steps ensure your concrete surface is flawless. With practice, you’ll achieve professional results every time.
Maintenance And Care
To ensure your finishing trowel lasts long, proper maintenance and care are crucial. A well-maintained trowel will perform better and provide a smooth finish. Below are some tips on how to clean and store your trowel properly.
Cleaning Your Trowel
Cleaning your trowel after each use is important. This prevents material build-up, which can affect performance.
- Rinse the trowel with water immediately after use.
- Use a brush to remove any stuck debris.
- Dry the trowel with a clean cloth to avoid rust.
For stubborn spots, soak the trowel in warm, soapy water for a few minutes. Then scrub gently with a brush. Avoid using harsh chemicals, as they can damage the metal.
Storing Tools Properly
Proper storage ensures your tools remain in good condition. Store your trowel in a dry place to prevent rust.
- Hang the trowel on a pegboard to avoid bending.
- Keep it away from damp areas to prevent rust.
- Store in a tool bag to protect from dust and dirt.
Regularly check your trowel for any signs of wear and tear. Replace it if the edges become chipped or uneven.
| Maintenance Task | Frequency |
| Rinse and dry | After each use |
| Soak for stubborn spots | As needed |
| Inspect for damage | Monthly |
Frequently Asked Questions
What Is a Finishing Trowel Used For?
A finishing trowel is used to create a smooth, polished surface on concrete, plaster, or drywall. It helps achieve a professional, even finish by eliminating imperfections and refining the texture.
How Do I Clean a Finishing Trowel?
To clean a finishing trowel, rinse it thoroughly with water and use a stiff brush to remove any concrete or plaster residue. Cleaning immediately after use prevents material buildup and extends the tool’s lifespan.
Can Beginners Use a Finishing Trowel?
Yes, beginners can use a finishing trowel, but mastering its technique takes practice. Applying consistent pressure and using smooth, sweeping motions are key to achieving a flawless finish.
When Should I Use a Finishing Trowel?
A finishing trowel should be used after the initial setting of concrete or plaster. Timing is crucial—using it too early can cause surface defects, while using it too late can make smoothing difficult.
What’s the Difference Between a Finishing Trowel and a Plastering Trowel?
A finishing trowel is primarily used for concrete and drywall finishing, featuring a flat, rectangular blade. A plastering trowel, on the other hand, is slightly more flexible and designed for applying and smoothing plaster or stucco.
Conclusion
Mastering the finishing trowel takes practice, but it’s worth the effort. Smooth surfaces enhance the final look of your project. Remember to keep your trowel clean and well-maintained. Consistent pressure and angles make a big difference. Don’t rush, take your time for a perfect finish.
With these tips, you’ll achieve professional results. Happy troweling!
Read also: