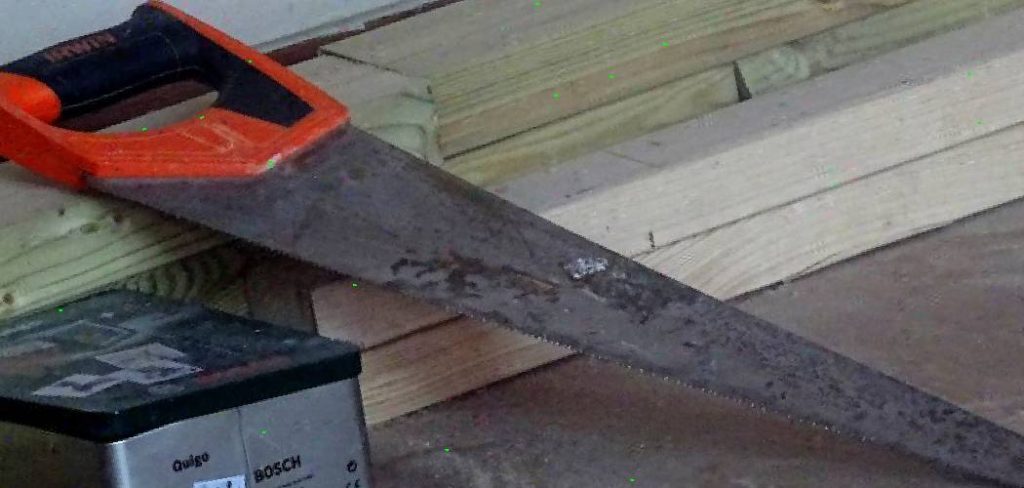
The hand saw is essential in woodworking, weaving intricate cuts and shaping wooden wonders. Yet, with each job, its teeth slowly dulled, dimming its once-glory. For the avid woodworker or occasional craftsman, restoring saw sharpness becomes an artistic duty. Fear not; In this guide, we’ll unlock the secrets of sharpening a handsaw with a Dremel and reveal the path to woodworking mastery.
When Do You Know Your Hand Saw Needs to Sharpen?
Once upon a time, there was a skilled craftsman named John in a small carpentry workshop. He took great pride in his work and meticulously crafted wooden masterpieces with his trusty hand saw. Day after day, John would diligently use his saw to shape and cut through various types of wood.

As time passed, John noticed subtle changes in his saw’s performance. At first, he attributed it to mere fatigue from extensive use. However, he soon realized that something was amiss. Here are the signs that told John his hand saw needed sharpening:
Resistance
As John applied force to guide the saw through the wood, he noticed increased resistance. A slight struggle replaced the once smooth and effortless gliding motion. It felt as if the teeth of the saw were battling against the wood rather than slicing through it like a hot knife through butter.
Slower Cutting
Another indication was the diminishing speed at which the saw cut through the wood. John’s cuts took longer than usual, causing frustration and delaying his projects. The saw seemed to be losing its efficiency, hindering his ability to work with precision and meet deadlines.
Uneven Cuts
John’s experienced eye began to notice imperfections in the cuts made by the saw. Previously, the saw would cleanly and smoothly slice through the wood, leaving neat, straight edges behind. However, he noticed jagged edges, splintering, and rough finishes on the wood’s surface.
Vibrations and Noise
As John worked with the saw, he felt increased vibrations and heard a louder noise than before. This indicated that the saw’s teeth were no longer sharp enough to cleanly shear the wood fibres, causing additional strain on the saw and discomfort to his hands.
Burning Smell
One day, while working on a particularly dense piece of hardwood, John detected a distinct burning odour. This smell was a telltale sign that the saw’s teeth struggled to penetrate the wood fibres efficiently. The friction generated by the dulled teeth created heat, resulting in an unpleasant scent.
Recognizing these signs, John knew that it was time to sharpen his handsaw. He understood that a dull blade compromised his work quality and put unnecessary strain on himself and the tool. So, with a determined spirit, he meticulously honed and sharpened each tooth of the saw, reviving its cutting power and ensuring the creation of beautiful wooden masterpieces once again.
How to Prepare Your Hand Saw to Sharpen With a Dremel?
Preparing your hand saw for sharpening with a Dremel requires a systematic approach. Here’s a step-by-step guide to help you prepare your hand saw properly:
Opening the Saw
Determine the type of fasteners securing the saw. If it requires a screwdriver, use an adjustable screwdriver to open it. If it has nuts and bolts, a sewing wrench can loosen them. Opening the saw allows for better access to the blade, minimizing potential errors during the sharpening process. It is recommended to open the saw, but if you have a partner who can firmly hold the saw in place, you may skip this step.
Clean the Saw
Before sharpening, clean the saw blade and teeth thoroughly. Use a wire brush or a suitable cleaning solution to remove debris, sawdust, or dirt that may hinder sharpening. A clean surface allows for better visibility and accuracy during sharpening.
Inspect the Teeth
Take a close look at the teeth of the saw. Check for damaged, broken, or missing teeth that require additional attention or replacement. Observe the tooth pattern and ensure it remains intact throughout the sharpening process.
Step-by-Step Guide – How to Sharpen a Hand Saw With a Dremel
Sharpening a hand saw with a Dremel rotary tool is a practical and efficient way to revive its cutting performance. The Dremel’s precision and versatility make it an excellent tool for this task.
Whether a woodworking enthusiast or a professional, keeping your hand saw sharp is essential for clean and accurate cuts. In this guide, we’ll take you through the step-by-step process of sharpening your hand saw with a Dremel to tackle your projects easily and confidently.
Materials and Tools You’ll Need:
- Hand saw
- Dremel rotary tool with a sharpening attachment kit (mini size). If you use a mini-size sharpening, it will easily fit inside the teeth of your hand saw.
- Safety goggles
- Gloves
- Vise or clamp to secure the saw
- Marker or pencil
Step 1: Safety Precautions
Before starting, prioritize safety by wearing safety goggles to shield your eyes from debris and gloves to protect your hands from sharp edges and potential cuts.
Step 2: Secure the Saw
Place the hand saw securely in a vise or clamp. This prevents movement and ensures your safety during the sharpening process. Make sure the teeth of the saw are accessible for sharpening.
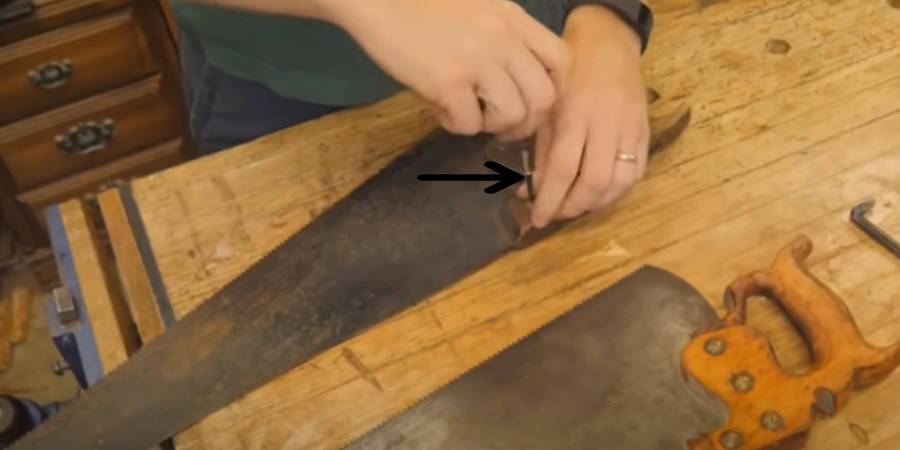
Step 3: Assess Teeth Condition
Thoroughly inspect the saw teeth. Look for signs of dullness, nicks, or irregularities. If you notice any teeth that appear damaged or blunt, mark them with a marker or pencil. This will help you focus on them during sharpening.
Step 4: Attach the Sharpening Tool
Consult the Dremel’s instruction manual to properly attach the sharpening attachment kit. Ensure that it’s securely and correctly fitted to the Dremel rotary tool. This attachment is specifically designed for sharpening purposes and will facilitate the process.
Step 5: Set Dremel Speed
Adjust the speed of the Dremel rotary tool to match the type of metal your hand saw is made of. Generally, a higher speed setting is suitable for harder metals, while a medium speed setting is appropriate for most hand saws.
Step 6: Sharpen Teeth
Hold the Dremel tool at the proper angle to match the existing bevel on the saw teeth. This angle typically ranges from 20 to 25 degrees. Maintaining this angle is crucial for achieving effective sharpening. Start with the first tooth you want to sharpen. Gently touch the rotating sharpening attachment to the tooth’s cutting edge.
Use a light back-and-forth motion to gradually sharpen the tooth. Avoid pressing too hard, as excessive pressure can cause overheating and damage the tooth. Take your time to achieve a sharp edge on each tooth.
Step 7: Test the Saw
After sharpening all the teeth, carefully remove the saw from the vise or clamp. Clean off any metal shavings and debris from the saw to ensure they don’t interfere with the cutting performance. Test the sharpness of the hand saw by making a few cuts on a piece of scrap wood. If the saw cuts smoothly and efficiently without excessive effort, you’ve successfully sharpened it.
What is the Alternative Way to Sharpen a Hand Saw?
An alternative way to sharpen a hand saw is by using a triangular file. Start by securely clamping the saw in a vise. Then, place the file on the tooth of the saw, angled slightly downward, and push it forward in a smooth motion. Repeat this process for each tooth, ensuring consistent pressure and angle. Finally, remove any burrs with a flat file and test the sharpness of the saw.

Some Special Tips for Sharpening a Hand Saw With a Dremel
It would be advisable to use the smallest kit with the Dremel and move from right to left when sharpening the saw. Dremel sharpening kit Don’t worry if your hand can’t get into the groove of the saw tooth, focus on sharpening the head of the hand saw tooth, so sharpen using the sharpening kit with the Dremel to create an inverted v shape on the head of the tooth.
What Safety Precautions Should You Keep in Mind When Sharpening a Hand Saw?
When sharpening a hand saw, it is important to observe the following safety precautions:
- Eye Protection: Always wear safety goggles or glasses to protect your eyes from flying metal shavings or debris that could cause harm.
- Secure the Saw: Prioritize safety by clamping the hand saw in a vise or using appropriate clamps. This ensures the saw remains stable throughout the sharpening process, preventing accidental slips or movements that could lead to injuries.
- Stable Work Surface: Choose a stable and level work surface to provide a solid foundation for sharpening activities. A secure work surface enhances balance and stability, reducing the risk of accidents.
- When using the Dremel or any other sharpening tool, apply moderate and even pressure on the saw teeth. Avoid excessive force that could cause the tool to slip or damage the saw.
- Protect Hands: Consider wearing protective gloves to shield your hands from the sharp teeth of the hand saw. Gloves offer an additional layer of safety in case of accidental slips.
- Mind Your Surroundings: Ensure your work area is clear of potential distractions or obstacles. Keeping the area tidy and free from hazards allows you to focus solely on the sharpening task, reducing the chances of accidents.
Adhering to these safety precautions can ensure a safer sharpening process and minimize the risks associated with handling tools and sharp objects. Safety should always be the top priority when working with power tools or any sharp equipment.
Can I Use a Dremel With a Diamond Cutting Mini Disc 40mm,20mm Shank for Hand Saw Sharpening?
It is possible to use a Dremel with a 40mm diamond cutting mini disc (20mm shank) for hand saw sharpening, but extreme caution is essential. This procedure can be dangerous as improper handling can cause injury.
Although this may be recommended if safety precautions are strictly followed, it is important to note that the process creates an inverted V-shaped contact on the saw teeth. Applying pressure beyond the gentle slide can be dangerous.
FAQs
What is the Most Simple Way to Sharpen a Hand Saw?
To sharpen a hand saw without specialized tools, use a mill file for jointing teeth and a triangular file for sharpening edges. Secure the saw, file across the teeth for uniform height, then file each tooth at the same angle as the bevel. Test the sharpness with a test cut on scrap wood. Professional sharpening may be needed for valuable saws. Use safety gear and maintain consistent strokes to avoid damage.
Is It Necessary to Sharpen a Hand Saw With a Dremel When Vise or Clamp Use?
A vise or clamp is recommended when sharpening a handsaw with a Dremel or other power tool. Securing the saw in a vise or clamp provides stability and prevents it from moving during sharpening. But I’d say it’s not mandatory to use it if you can hold the handsaw in place with something else so it doesn’t move.
Conclusion
Sharpen a hand saw with a Dremel. I wrote this article in imitation of my father, as he is a carpenter. If you have a different opinion about it, let me know by commenting below. Also, I request you to share this article with your friends if you get even a little benefit from it.
Read More –